DriveHUD 2 Knowledge Base
There are two primary ways to add a heat map to your HUD. You can add one via drag-and-drop, or by editing a selected stat you have in your HUD. This article will explain both options.
D&D (Drag-and-drop)
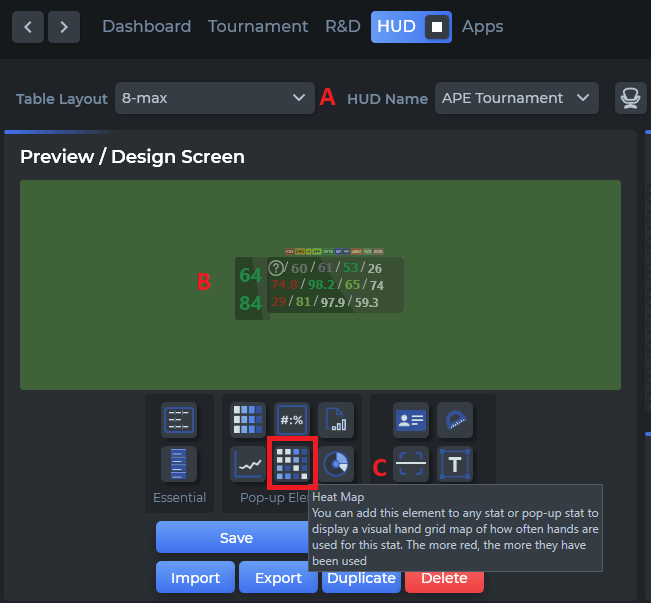
- Select the HUD you’d like to add a heat map to from the two drop down menus (Section A above).
- Once you see your HUD in the design / preview area (Section B), drag and drop the heat map icon (Section C – circled in red) to the stat that you’d like the heat map added to. Click the green check mark (Section F below), and then click the Save button.
Drag-and-Drop Heat map to a pop-up menu
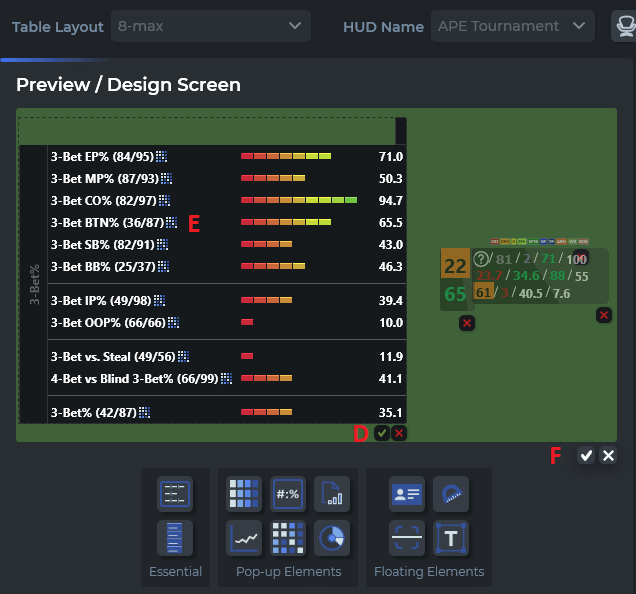
- Once you have your HUD selected that you’d like to edit (see step 1 in previous section), click in the design area (Section B above), and then click on the HUD stat which contains the pop-up you’d like to add a heat map to. If you have multiple pop-ups, you may have to click the green checkmark to close a pop-up(Section D) to see the pop-up you’d like to add your heat map to.
- Once you’ve located the pop-up, simply drag and drop the heat map icon (Section C previous section) to that stat.
- Click the checkmark to save your HUD (Section F), and then click the blue SAVE button.
Add a Heat Map by Editing an Existing Selected Stat in a pop-up menu
Note: This function only applies to editing a pop-up menu that was created in the pop-up designer.
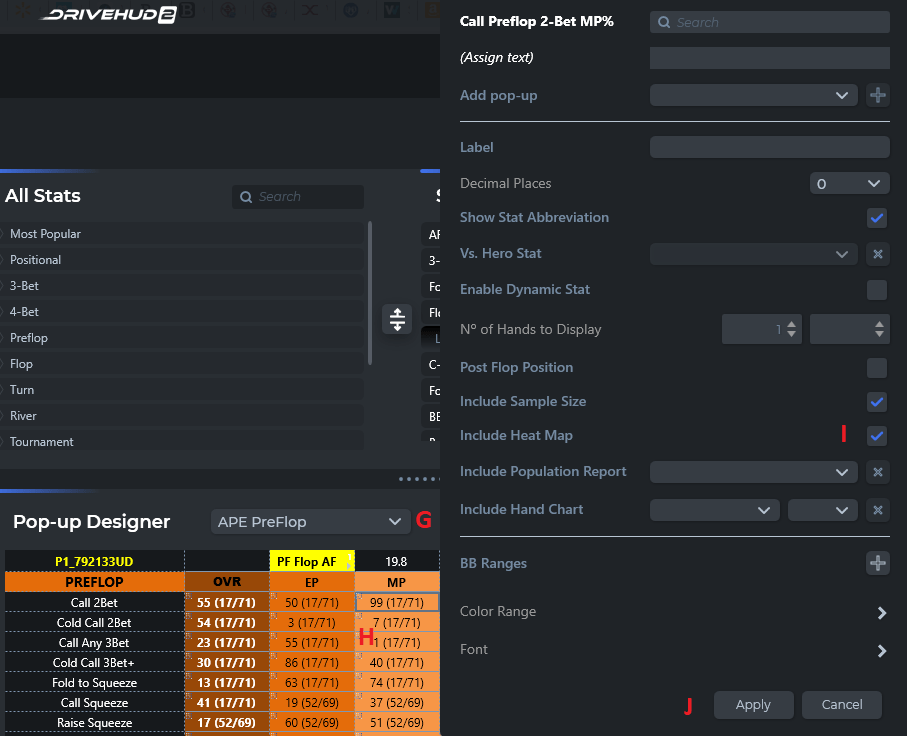
- Select the pop-up you’d like to add a heat map to from the pop-up designer pull down menu (Section G above).
- Left-click on the stat (Section H) you’d like to add a heat map to in the pop-up designer.
- You’ll get a pop-up menu. Check – Include Heat Map (Section I above).
- Click Apply (Section J). And make sure to save your HUD by clicking the checkmark that is right below the design screen (Section F above).


