Currently DriveHUD 2 is a PC-only based application but you can run it on a MAC for free using macOS’ free utility called Boot Camp.
Simply follow the instructions below to install Windows on your Mac OS:
Before Getting Started:
A few things to consider before you start installation:
- Boot Camp is not available in the latest M1 Macs. Boot Camp only works with Intel chips and does not support the latest M1 chips in the latest generation of Macs. The only way to run Windows on an M1 Mac is to use the Parallels virtualization software which can install Windows on M1 Macs.
- The following Mac models (running MacOS El Capitan 10.11 or later) will allow you to install Windows using Boot Camp without the need for an external storage device:
- MacBook Pro (2015 and later)
- MacBook Air (2015 and later)
- MacBook (2015 and later)
- iMac (2015 and later)
- iMac Pro (all models)
- Mac Pro (Late 2013)
- You can download and install Windows 10 for free on a mac because you don’t need to activate it with a product key unless you want to do some customizations.
- It’s always a good idea to backup your Mac to an external hard drive before installing Windows on it.
Download Windows 10 ISO file
1. Click here to go to Microsoft Windows 10 download page.
2. Under “Create Windows 10 installation media” section, click on the “Download Now” Button.
3. Run the Media Creation Tool.
4. Select “Create installation media (USB flash drive, DVD or ISO file) for another PC” and then click Next.
5. Select your Language, and on Architecture select 64-bit (x64). Click Next.
6. On the “Choose which media to use” window, select ISO file. Click Next. Choose a location where you want to save the ISO file. (on your Mac or on an external storage) Click Save and wait for the download to finish.
Prepare your Mac
1. Make sure you have at least 64GB or more of free disk space on your Mac. 128GB is recommended. At this point, it’s better to go with more rather than less because you can always the Windows partition later.
2. Make sure that your Mac has full battery or better yet, have it plugged in during the entire installation time.
3. Backup of your Mac hard drive or of your most important files at least.
Install Boot Camp and Windows 10 on your Mac
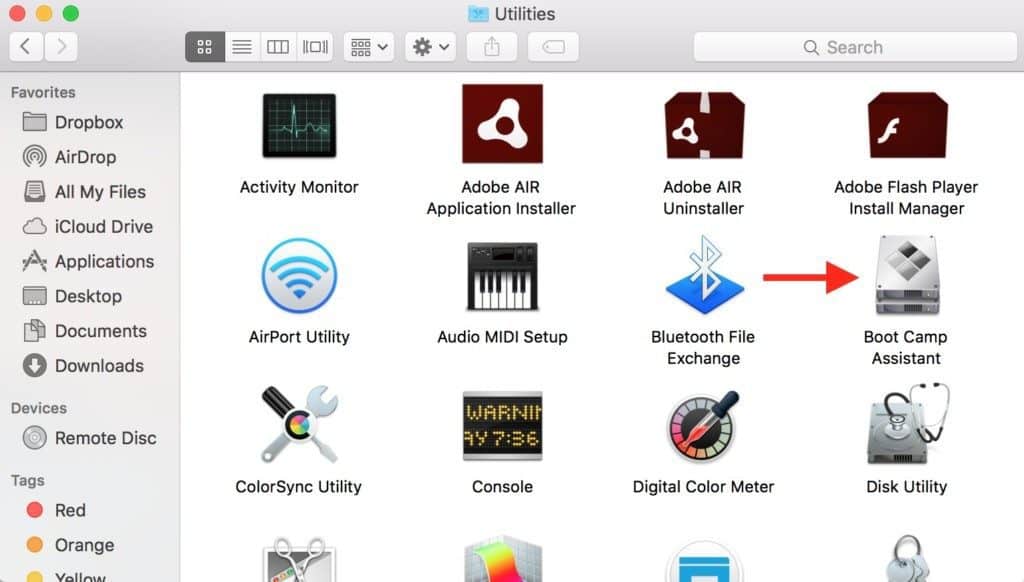
1. On Mac Finder, go to Applications > Utilities > Boot Camp Assistant.
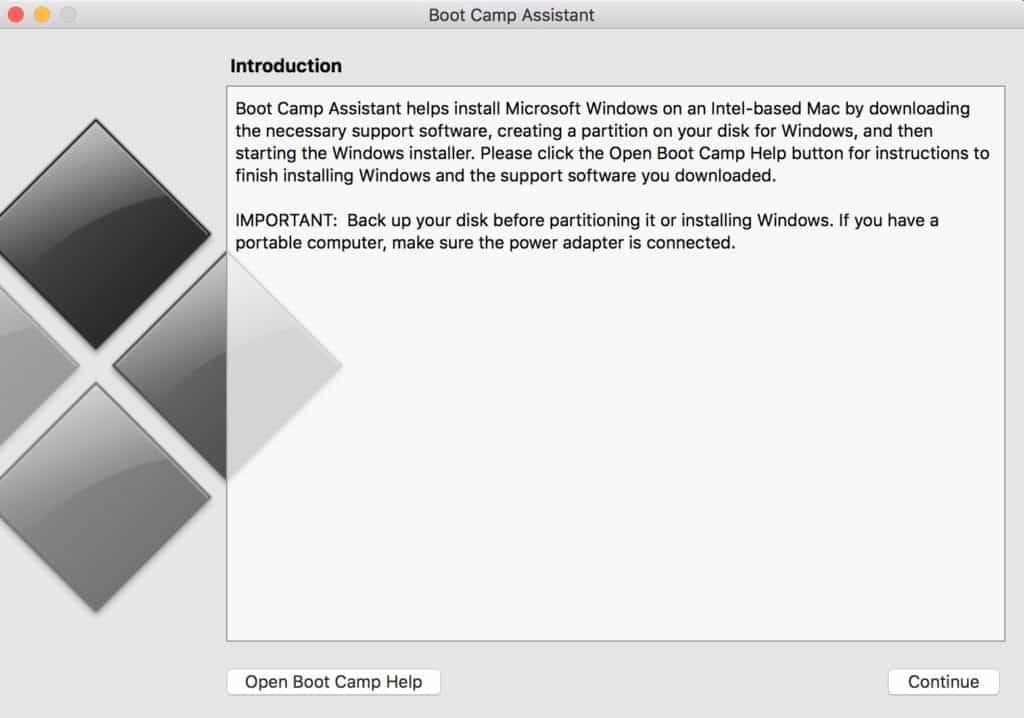
2. You’ll get a warning that Boot Camp will create a partition on your hard drive and that you should backup your Mac before proceeding. If you’re done with this, click Continue.
3. In the next dialogue, make sure that all options are checked.
- Create a Windows 10 or later install Disk
- Download the latest Windows support software from Apple
- Install Windows 10 or later version
If you don’t want to install Windows right now or just want a Windows install USB drive you can use on another Mac, you can leave the last option unchecked.

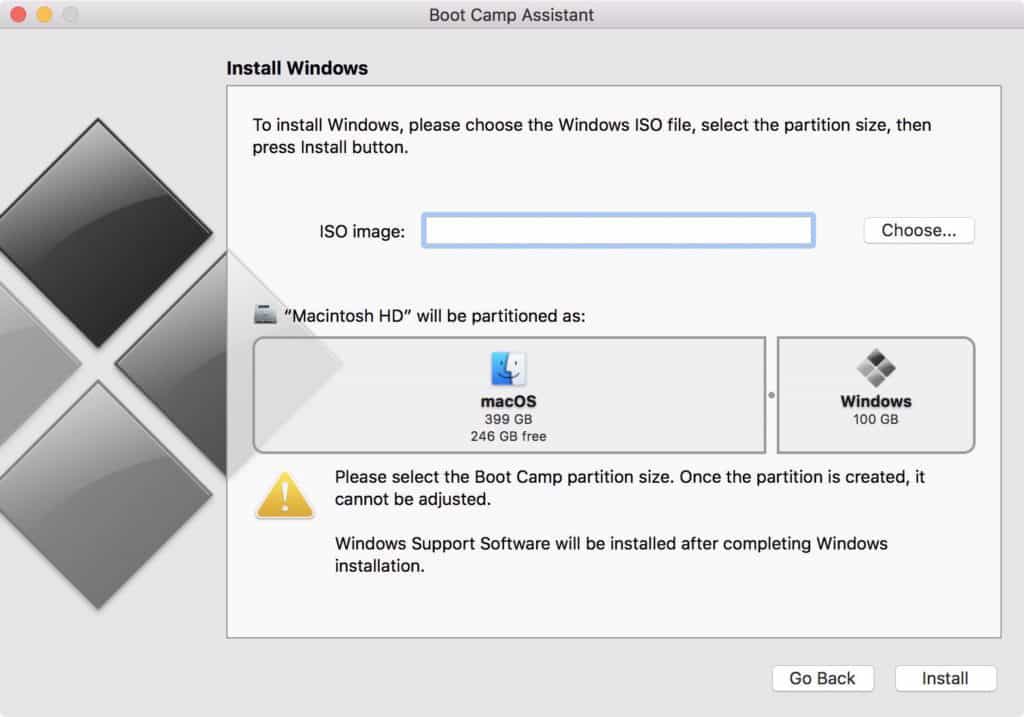
4. Click Continue then click on Choose button. Browse to the Windows 10 ISO image you downloaded earlier. You can also choose how much hard drive space you want for the Windows installation. Consider the programs you’ll be installing and if there’s a lot, a bigger storage is recommended/better.
5. When you’re good with the configuration, click on Install. This will start the Windows boot disk installation process, including the downloading of necessary Windows support software from Apple (required by Boot Camp to install Windows). Be patient as this process can take some time; it may appear frozen or stuck but it’s just decompressing the files.
When this is complete, your Mac will restart and Windows will setup on your Mac just as if you were installing it on a PC for the first time.
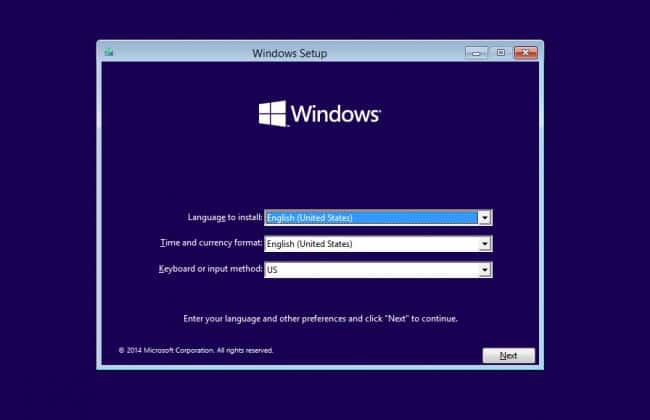
6. On the next window, configure your language settings, time, currency, and keyboard language.
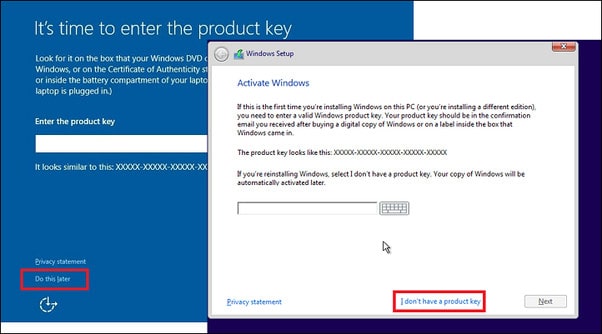
7. When asked for a Windows 10 Product Key, just click “I don’t have a product key” at the bottom of the screen. (Unless of course you have one) Remember that Microsoft now allows you to use Windows 10 without activating it so you don’t really need a Product Key.
You can select either Windows 10 Home or Pro, but Home is the cheaper option and is already enough for most users’ needs.
8. Accept the License prompts and Windows will start the final stages of installation.

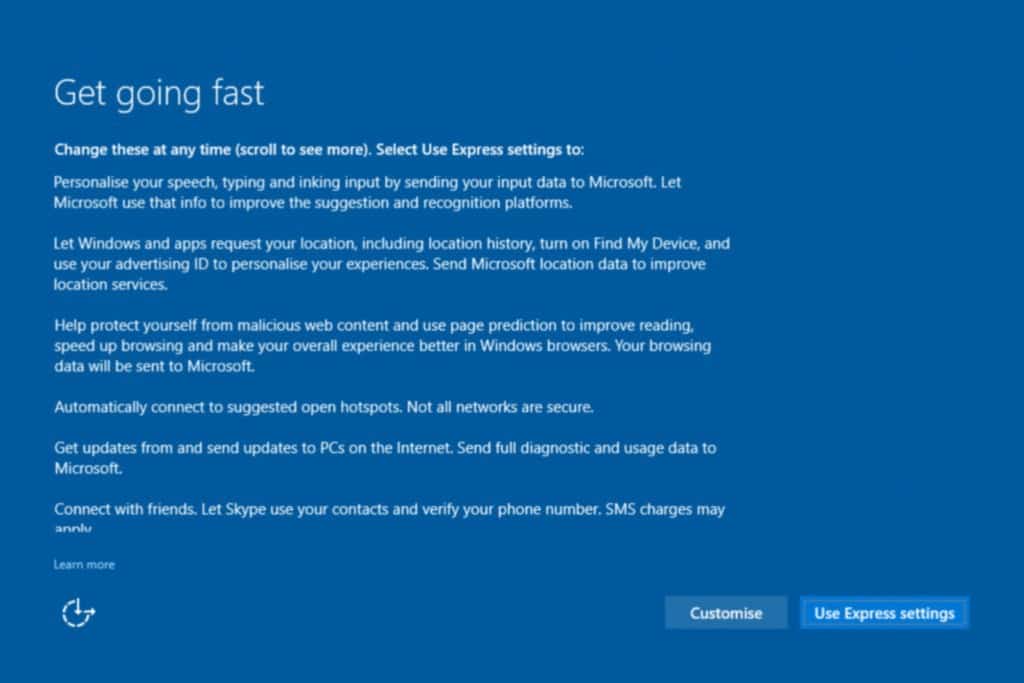
9. After a few minutes, your Mac will again reboot and you’ll reach the final setup screen called Get Going Fast. You can either choose Express Settings or Customize.
10. You’ll be asked to create a Windows account. Windows will encourage you to use Cortana (Microsoft’s counterpart for Siri) but you can select Not Now.
11. Windows 10 will then open on your Mac but Boot Camp is not done yet. You’ll see another Boot Camp installer dialogue prompting you to install more drivers. Click Next until these are complete. Your Mac will reboot.
12. Finally, click on the Windows Start Menu and select Apple Software Update. This will update Windows with the latest drivers so that your soundcard, graphics card, and other hardware work smoothly with Windows. Your Mac will once again reboot to Windows 10.
13. Lastly, make sure that Windows security patches are up to date. Go to Start > Settings > Update & Security and Windows will automatically download any security updates. Not really required but we recommend it.
And that’s it, you’ve got Windows 10 installed on your Mac for free.
14. You can now download DriveHUD 2 inside Windows and install it as you would on a PC.
Additional Notes:
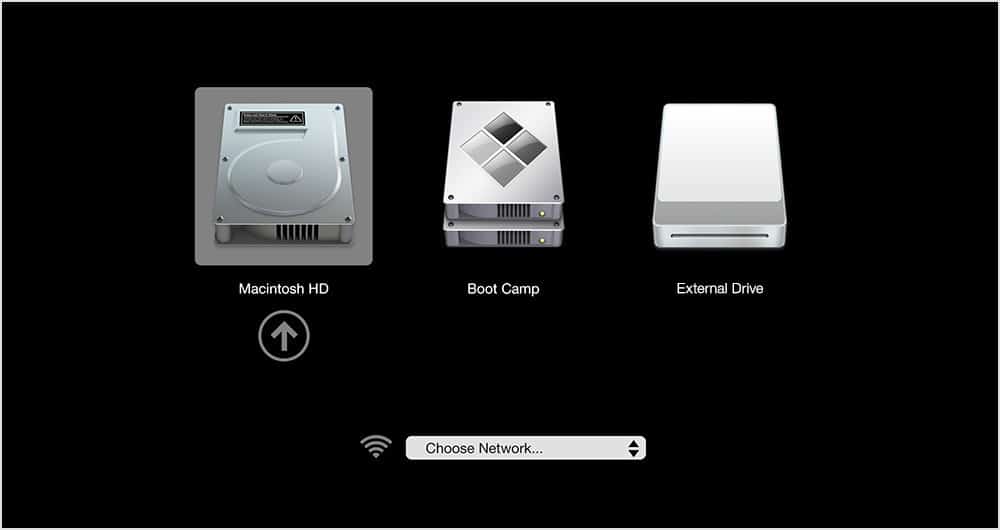
15. To enable macOS as your default operating system, in Windows go to Control Panel, System and Security and then scroll to the bottom where you will see Boot Camp. From there you can select Macintosh HD as your default operating system and click OK to save.
Alternatively, you can choose whether your Mac boots into Windows or macOS by holding down the Option key on your Mac when you switch it on.

And after about 5 to 10 seconds, you will be given the option of which operating system you want your Mac to boot.
If you have any further questions or need any setup assistance, please contact support from this page: https://drivehud.com/support/