How do I setup DriveHUD 2 with MPL Poker?
MPL Poker Site Setup
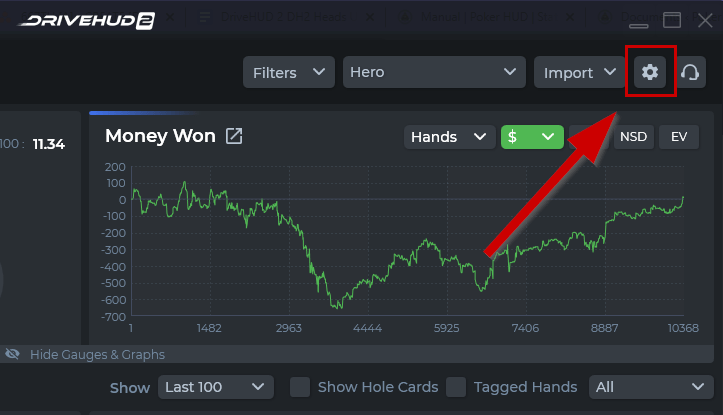
1) Click on the SETTINGS button icon at the top right-hand side of DriveHUD 2.
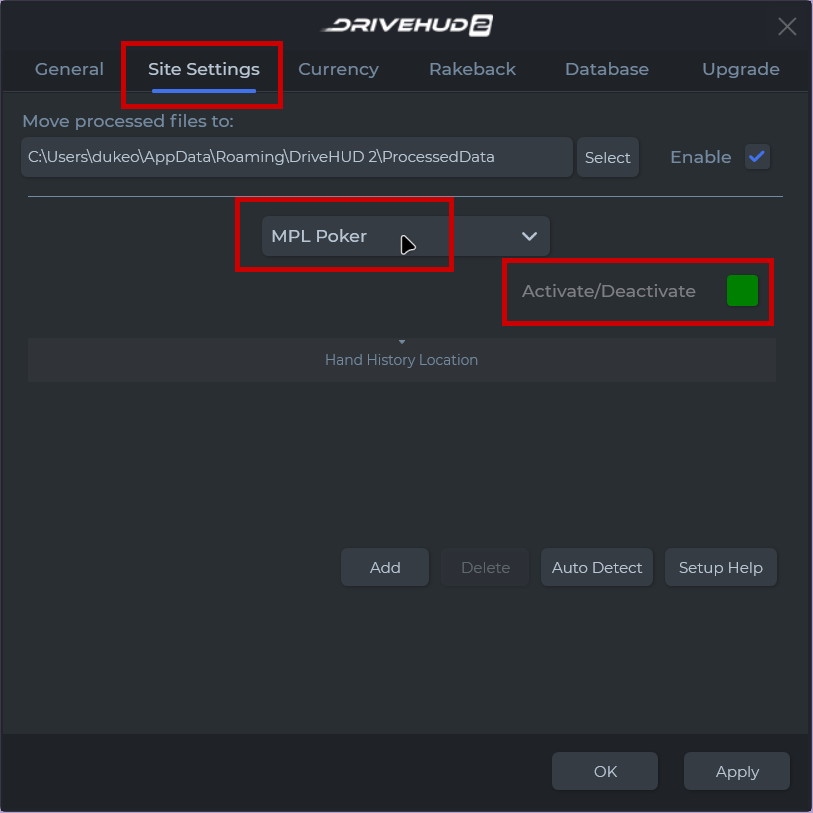
2) Click on the SITE SETTINGS tab in the settings window.
3) From the drop-down menu shown below, select – MPL Poker.
4) Make sure that the Activate/Deactivate button is GREEN. If it’s RED, click on it so it’s enabled in GREEN.
5. Click on APPLY and OK.
That’s it. You need to make sure that you have DriveHUD 2 loaded before your poker client is loaded. Wait for one full hand to be played before the HUD will appear.
Important Notes:
If the hand history location is set in the MPL Poker application initially, then DriveHUD will detect it automatically on 1st launch and will add it to hand history locations for MPL Poker.
If hand history location isn’t set in the MPL Poker application, then you need to go to MPL Poker hand history settings, set it, then go to DriveHUD site settings > MPL > then click on Auto Detect or add it manually by clicking on the “Add” button.
If you change your hand history location in the MPL Poker application, then you will need to change it in DriveHUD Site Settings as well for MPL ( click on auto-detect or add it manually)
If you have any further questions or need any setup assistance, please contact support from this page: https://drivehud.com/support/


