Quick Filters Tab Overview
The quick filters section allows you to generate common pre and post flop filters with just one click. The following is an overview of the Quick Filters section:
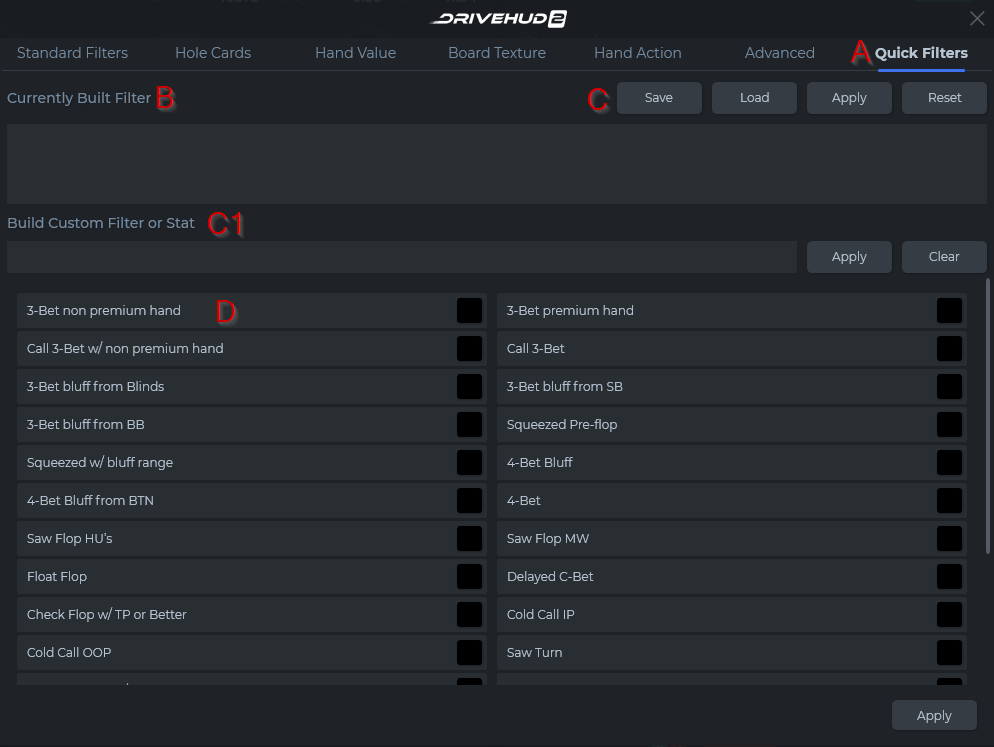
A) Quick Filters Tab – This is the first tab from the right of the create filter pop-up window.
B) Currently Built Filter – When a filter is created it will display in this box below. You can click on the X in the corner of the filter to remove it, or mouse over the filter to see a full description of the filter.
C) Save Filter Buttons – From here you can Save your currently built filter and name it, Load a filter you created, Apply it to your current data, or Reset (remove) the current filter you created.
C1) Filter or stat building section – You can type in the format for a stat, then you click Save Stat and it will make it available in your reports and your HUD to add. If you create it as a filter, then it will list as a filter you can load
Click here to view the DH2 Filter Language Table.
D) Quick Filter Buttons – Click on any filter from the list to add it to the current built filters section (section B). Once you select a filter it will turn GREEN indicating it’s active (set to YES). Click the same filter again to turn it RED, indicating it’s set to NO (or, filter for any scenario EXCEPT this situation).
Check out the Other Filter Tabs in DriveHUD 2
- Standard Filters Tab Overview
- Hole Cards Tab Overview
- Hand Value Tab Overview
- Board Texture Tab Overview
- Hand Action Tab Overview
- Advanced Tab Overview
If you have any further questions or need any setup assistance, please contact support from this page: https://drivehud.com/support/